Using Microsoft Track Changes — Word 2003
Step 1:
Open your Microsoft Word document and locate the button labeled Accept or Reject Changes.... If you cannot see the Accept or Reject Changes... button on your toolbar, review the next 7 steps.

Step 2:
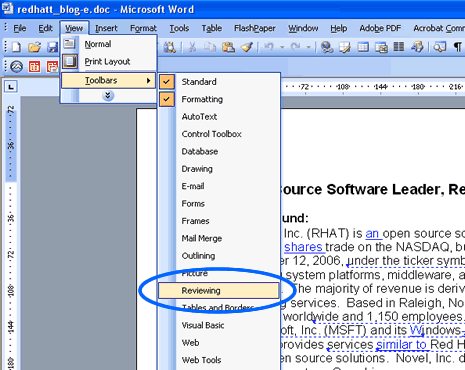
Move your cursor to View on the main toolbar and click once. Position your mouse over Toolbars, and then turn-on the Reviewing feature.
Step 3:
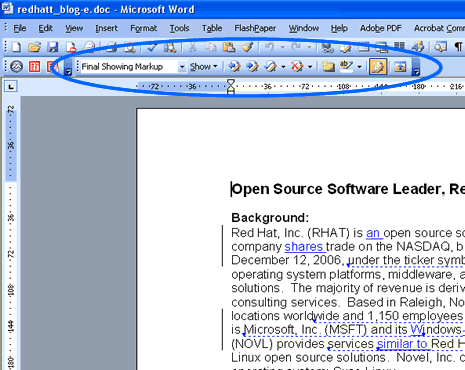
The Reviewing toolbar has been circled in blue in the picture below. The Track Changes icon is illuminated ![]() in this illustration. Turn this feature off prior to making alterations to your document. If you do not turn the Track Changes feature off, any revisions made to the document will be tracked in the right-hand margin.
in this illustration. Turn this feature off prior to making alterations to your document. If you do not turn the Track Changes feature off, any revisions made to the document will be tracked in the right-hand margin.
Step 4:
Click once on the illuminated Track Changes icon ![]() to turn off the feature. You can make revisions to your document once the icon is no longer illuminated
to turn off the feature. You can make revisions to your document once the icon is no longer illuminated ![]() .
.

Step 5:
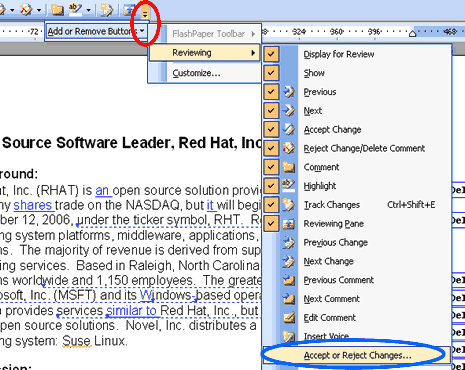
Move your cursor over the down arrow ![]() and click once. You will find the drop-down arrow next to the Reviewing Pane icon
and click once. You will find the drop-down arrow next to the Reviewing Pane icon ![]() (the icon is circled in red).
(the icon is circled in red).
Move your mouse to Reviewing and click Accept or Reject Changes... (circled in blue).
Step 6:
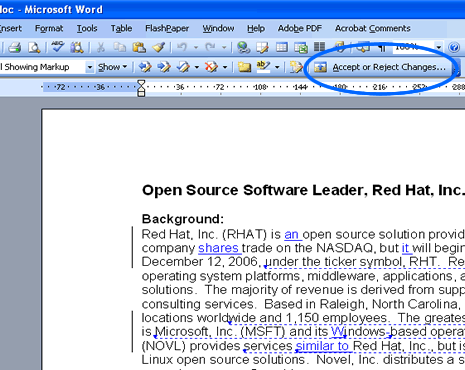
The Accept or Reject Changes... button should appear after you complete step 5. In the following image, it is circled in blue.
Step 7:
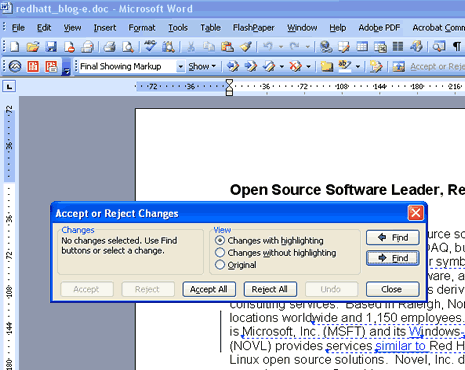
Move your mouse to the Accept or Reject Changes... button and click once. A new reviewing pane will open; refer to the image below.
Tips:
To toggle to the first proposed change, click on Find. To accept or reject editor suggestions, click on Accept or Reject. Word removes the revision marks after a suggestion has been accepted or rejected. Word automatically moves to the next suggestion.
Click on Accept All to accept all editor suggestions. Editor comments will need to be addressed individually.
